Using Vivi to Play Video
Vivi is a wireless screen-sharing device that enables you to connect to the big screen and still move around the room with your laptop. In addition to a basic screen-sharing function, it is able to play video links directly, which generally allows them to load better and play at a higher quality.
How to use the "Play Video" fuction of Vivi:
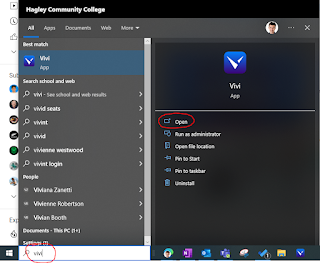
Step 1: Vivi is preinstalled on all school laptops, so search for it in the Windows search box:
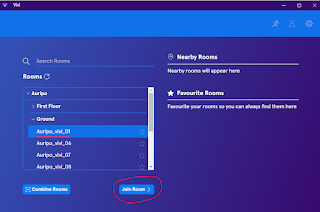
Step 2: Select the screen you want to connect to and select "Join Room":
Step 3: Enter the room code (this will appear on the TV which you are trying to connect to)
Step 4: Once connected, click "Play Video" open up the video playing menu
Step 5: Copy the URL of the video you want to play. (NB Any video from YouTube, Vimeo, and certain news sites will work, but any streaming service requiring a log in will typically not).
Step 6: Paste the link into the provided box. You can now play the video.
If you are preparing for a later class, or have some videos you would like to come back to, it can be helpful to create a playlist. Use the "Add to Queue" button to queue up multiple video links, then "Save Playlist" to essentially create a folder of videos. If you want to add videos to an existing playlist, open the playlist, add more videos to the queue, then save it with the same name to overwrite the old version.


Comments
Post a Comment